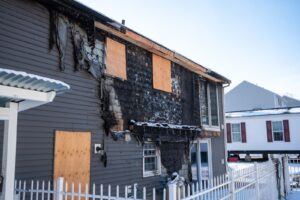
A fire damage assessment documents what happened, confirms the property is safe to enter, and outlines the cleanup and repair plan. You’ll learn what is salvageable, what you need to remove, and what the next steps look like, including timelines and pricing factors. The findings will guide insurance documentation and the full recovery process.
What happens after the fire is out
After a fire, it’s normal to feel stuck between urgency and uncertainty. You want answers fast. Is it safe to go inside? What can you save? How long will repairs take, and what will they cost? The answer to all of these questions comes from a professional fire damage assessment.
In this guide, you’ll learn what happens during the evaluation, how timelines typically unfold, what influences costs, and how to avoid delays with insurance. You’ll also see practical examples and the best ways to prepare for contractor conversations after fire damage.
What the assessment is and what it covers
A post-fire assessment accomplishes three essential tasks: it helps confirm safety, documents the full scope of the loss, and creates a clear plan so that repairs can begin without guesswork. It also accounts for secondary problems that worsen if left unaddressed, including residue spread, water impacts, and odor absorption.
A professional team typically evaluates:
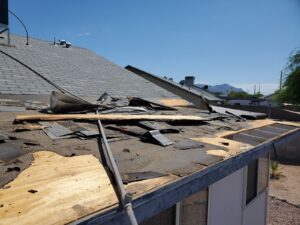
- Structural stability: Roof decking, trusses, framing, and any load-bearing components that may have weakened from heat exposure.
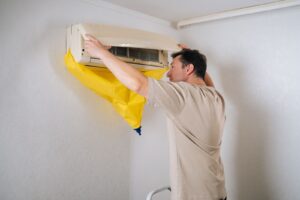
- Electrical and mechanical systems: Restoration professionals check wiring, breakers, outlets, appliances, and HVAC components for exposure to heat, smoke, or water.
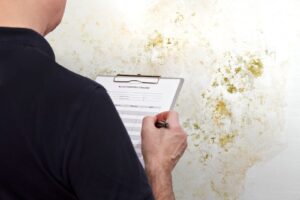
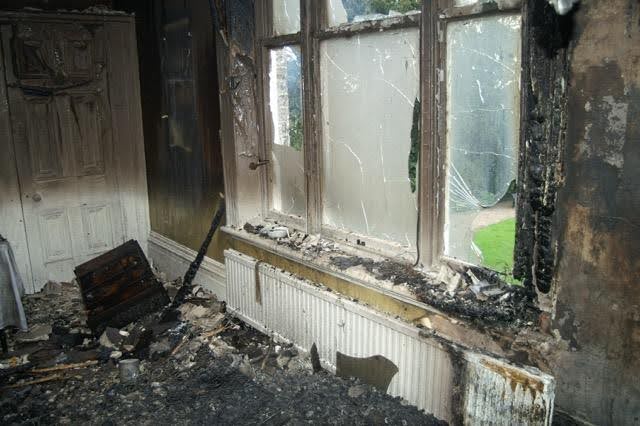
- Smoke and residue migration: Residue travels through ventilation pathways, wall cavities, and attic spaces, settling far beyond the burn area.
- Water impacts from suppression: Standing water, saturated drywall, swollen flooring, and moisture trapped behind baseboards.
- Odor absorption and indoor air concerns: Soft goods, insulation, and porous building materials retain odors long after you remove visible residue.
- Contents and personal property: Determine what you can clean, what needs specialized treatment, and what you must discard for safety.
At this point, the recovery plan begins to take effect. Your assessment helps determine what needs immediate stabilization, what can wait, and how to sequence work to prevent secondary damage and unnecessary costs.
The earlier you document and stabilize the property, the more likely you are to reduce preventable loss and keep the restoration plan on schedule.
Step-by-step: timeline, scope, and pricing factors
1. Safety clearance and access
Clear the site for entry before anyone performs a detailed evaluation. That often means waiting for the fire department to release the property and confirm utilities are safe. If the structure is unstable, professionals may limit entry at first and focus on critical documentation and stabilization.
Typical timing: Within 48 hours, depending on access and safety conditions.
2. Emergency stabilization
Stabilization prevents further loss. This may include board-up, roof tarping, temporary fencing, and securing entry points. It also reduces the chances of weather intrusion and theft, which can complicate your claim and expand the scope of fire damage.
Cost note: Stabilization costs vary based on materials, labor, and the degree of structural exposure. Fast action often prevents additional interior damage.
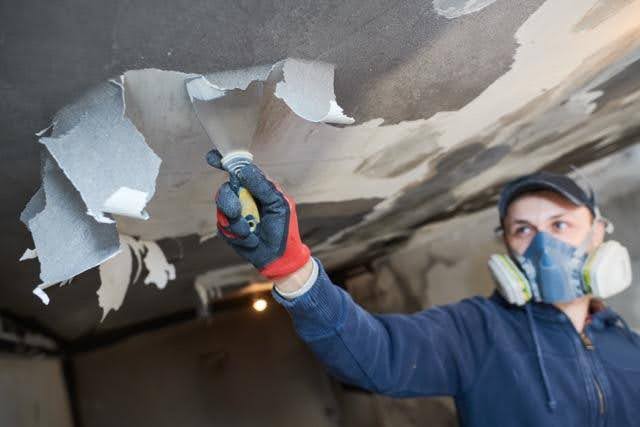
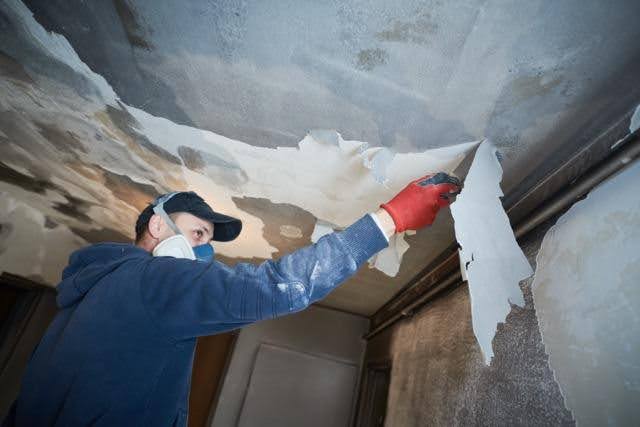
3. Detailed evaluation and documentation
During this phase, the team conducts a room-by-room walkthrough, capturing photos, notes, measurements, and material conditions. They document what needs cleaning, what needs removal, and what may be salvageable with specialized processes. This stage often includes creating an inventory plan for affected contents.
This is the formal fire damage assessment that supports scope, scheduling, and insurance documentation.
4. Moisture checks and drying plan
Suppression water creates hidden problems even when the fire damage looks contained. Professionals check moisture in drywall, flooring, framing, and insulation, then determine whether targeted drying is necessary. Delaying drying quickly degrades materials, increasing the overall cost and complexity of cleanup.
Cost note: Drying costs depend on square footage, saturation level, access, and equipment needs. Early extraction and targeted drying usually save time and money.
5. Residue and odor evaluation
Residue will stain finishes, etch surfaces, and corrode metals. Odors often sink into insulation, framing, furniture, and textiles. A good assessment maps where residue traveled and how aggressive cleaning must be, including whether HVAC pathways may have carried contaminants.
Pricing factors:
- How far the residue traveled beyond the origin
- Whether HVAC systems were impacted
- Surface type (porous vs. nonporous)
- The amount of detailed cleaning required (trim, cabinetry, fixtures, and contents)
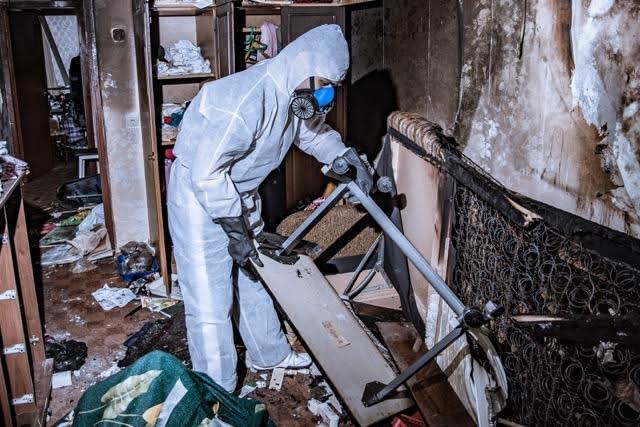
6. Contents plan: Clean in place vs. pack-out
Depending on severity, the team may recommend cleaning contents on site or performing a pack-out for specialized treatment. Pack-outs protect belongings while repairs happen, but they add inventory and handling time.
Cost note: The volume, materials, and any specialty processes needed for electronics, textiles, and heirlooms determine the scope of the contents work.
7. Scope, estimate, and timeline build
Once documentation is complete, you’ll receive a scope of work and an estimate. In some cases, the provider may offer a preliminary range and finalize after opening limited areas to confirm hidden impacts. This is where you gain clarity on phases, sequencing, and what drives the timeline.
This is also the point where many properties transition into fire damage restoration, including cleaning, removal, rebuilding, and final detailing.
8. Insurance coordination
A clear scope supports the claim and reduces delays. Your file should include:
- Photos and videos
- Written scope of work
- Itemized estimate, when available
- Notes about safety restrictions and access limits
- Receipts for temporary expenses (lodging, meals, and urgent supplies)
Tip: Keep a simple log of who you spoke with, what they said, and the date. It makes follow-ups easier and helps prevent miscommunication.
Benefits of moving quickly
Acting quickly after a fire helps protect the property, reduces preventable loss, and keeps the recovery process more manageable. A fast response also provides your restoration team and insurance provider with clearer documentation to work with. Key benefits include:
- Faster decisions about safety and occupancy so you know sooner whether you can enter the property, retrieve essentials, or plan temporary housing.
- Better documentation for insurance conversations because early photos, measurements, and inventories capture the full scope before cleanup or deterioration changes what’s visible.
- Less chance of secondary deterioration, including staining, corrosion, and odor absorption, since soot and smoke residues continue damaging surfaces over time.
- Clearer scheduling for repairs and trades because early assessments allow contractors to order materials, plan demolition, and coordinate rebuild phases without last-minute surprises.
- A smoother transition into fire damage restoration by avoiding stop-and-start delays caused by incomplete scope, missed moisture issues, or late discovery of hidden damage.
Common mistakes to avoid
Avoid these missteps that often slow recovery or increase costs:
- Entering the property before clearance and disturbing impacted areas
- Throwing away items before documenting them
- Using DIY methods that spread residue or set stains
- Delaying water extraction or drying
- Accepting vague scopes without written detail
- Forgetting to track temporary living expenses and receipts
- Hiring contractors without specialized experience in restoration work
Important findings that influence restoration outcomes
- Dry wet materials quickly after water exposure to reduce the chance of microbial growth and material breakdown.
- Residue travels through airflow pathways and settles in areas that appear untouched at first, which is why room-by-room documentation matters.
- Odors embed into porous materials, and delaying treatment often makes removal more time-consuming.
- Clear documentation and a defined scope minimize back-and-forth during claims, helping to keep projects on schedule.
Documents and tools that prevent delays
Helpful documentation to gather
- Wide-angle photos of every room, plus close-ups of affected areas
- Video walk-through with narration, including dates and room locations
- Serial numbers for appliances and electronics, when possible
- A basic inventory list of items affected
- Receipts for lodging, meals, and emergency supplies
- A communication log for insurance and contractor conversations
Tools professionals may use
- Moisture meters and thermal imaging
- HEPA filtration and air scrubbers
- Specialized cleaners for residue and odor control
- Containment materials to prevent cross-contamination during cleaning
- Inventory systems for contents and pack-outs
If you feel overwhelmed, focus on the essentials: document everything, save receipts, and request a written scope.
FAQs
How long does a fire damage assessment usually take?
Most evaluations take a few hours for an average home, but the timeline depends on safety restrictions, property size, and how far residue and water spread. Larger losses require multiple visits to document everything thoroughly.
Can I stay in my home during the assessment?
Sometimes, but not always. Safety concerns, air quality issues, and water saturation make temporary relocation the safest option. A qualified team can advise whether limited occupancy is safe and which areas should remain off-limits.
What affects the cost of the overall project the most?
Costs often rise when residue spreads widely, porous materials absorb odors, or structural repairs are needed. Suppression water can also increase drying needs. Detailed documentation reduces surprises and helps keep the project from expanding unexpectedly.
Will insurance cover the assessment?
Coverage depends on your policy and the cause of the incident. Some costs may fall under emergency services or mitigation categories. Keep receipts and request written documentation to submit a complete and organized file.
What should I do before the restoration team arrives?
If it’s safe and you have clearance, take photos and videos, protect important documents, and avoid disturbing impacted areas. Do not clean residue with household products unless instructed to do so. Focus on documentation and safety first.
Trust Total Flood and Fire Restoration to restore your home
A fire damage assessment gives you clarity after a fire: what’s safe, what must happen next, and what factors will shape the timeline and cost. The sooner you document the impact and stabilize the property, the smoother the recovery tends to be. If you need help right away, Total Flood and Fire Restoration is available 24/7 to guide you through assessment, cleanup, and full fire damage restoration.