Dealing with water damage on your ceiling can be stressful and overwhelming. Whether caused by a leaky roof, burst pipe, or overflowing bathtub, the damage can lead to structural issues, mold growth, and potential health hazards if not addressed promptly. Knowing what steps to take can help mitigate further damage and restore your ceiling.
In this guide, we will discuss the immediate actions you should take, how to protect your belongings, and the importance of drying out the affected area to prevent further complications.
By following these guidelines, you can effectively navigate the process of dealing with water damage on your ceiling and restore your living space to its previous condition.
Understanding the Causes of Ceiling Water Damage
Leaking pipes, roof leaks, and condensation are among the most common causes of water damage to ceiling. Let’s take a look at exactly how this happens.
- Leaking pipes: Water can escape and travel along the pipe when pipes develop leaks, eventually reaching the ceiling above. This can result in water stains, discoloration, and even structural damage to the ceiling.
One common scenario is when a pipe on an upper floor or in the ceiling develops a leak. The water can seep through cracks or openings in the pipes and start dripping onto the ceiling below. Over time, this continuous dripping can lead to the formation of water stains and cause damage to the ceiling material, such as sagging or bulging.
Another way leaking pipes can cause water damage to your ceiling is through pipe bursts or larger leaks. When a pipe bursts, a significant amount of water can gush out rapidly, potentially causing widespread damage to the surrounding area and the ceiling above. The sheer volume of water can result in the ceiling becoming saturated, leading to further structural damage. - Roof leaks: Damage to the roof creates openings through which water can enter your home during rainfall or storms. When it rains, water can seep through the damaged areas of the roof and make its way into the attic or ceiling space.
Over time, if the roof leak is not fixed, the water can accumulate and saturate the ceiling material, leading to visible signs of water damage. This can include water stains, discoloration, peeling paint, sagging, or structural issues like bulging or collapse.
The path the water takes from the roof leak to the ceiling may not always be straightforward. Water can travel along roof beams, insulation, or other building materials before finally dripping onto the ceiling. As a result, the signs of water damage on the ceiling may appear in a different area from the actual point of entry on the roof. - Condensation: Condensation can cause water damage to your ceiling when warm, moist air comes into contact with a cold surface, such as the ceiling. This typically occurs in areas with high humidity, inadequate insulation, and poor ventilation.
When warm air in your home contacts the cooler ceiling surface, it cools down and releases moisture in the form of condensation. Over time, this moisture can accumulate and lead to water damage on the ceiling, including discoloration, staining, peeling paint, and even the growth of mold or mildew.
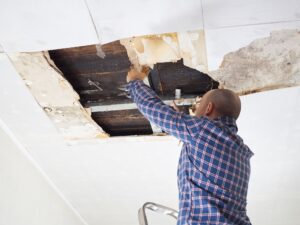
How Bad Is the Ceiling Water Damage?
Once you’ve noticed water damage to ceiling, you’ll want to figure out how bad it is. Water damage to the ceiling is not fun to deal with, but it is an issue that can be effectively remediated. Whether you’ve caught it in its early stages or it’s caused enough damage to necessitate significant repairs, there are a few things you can look for.
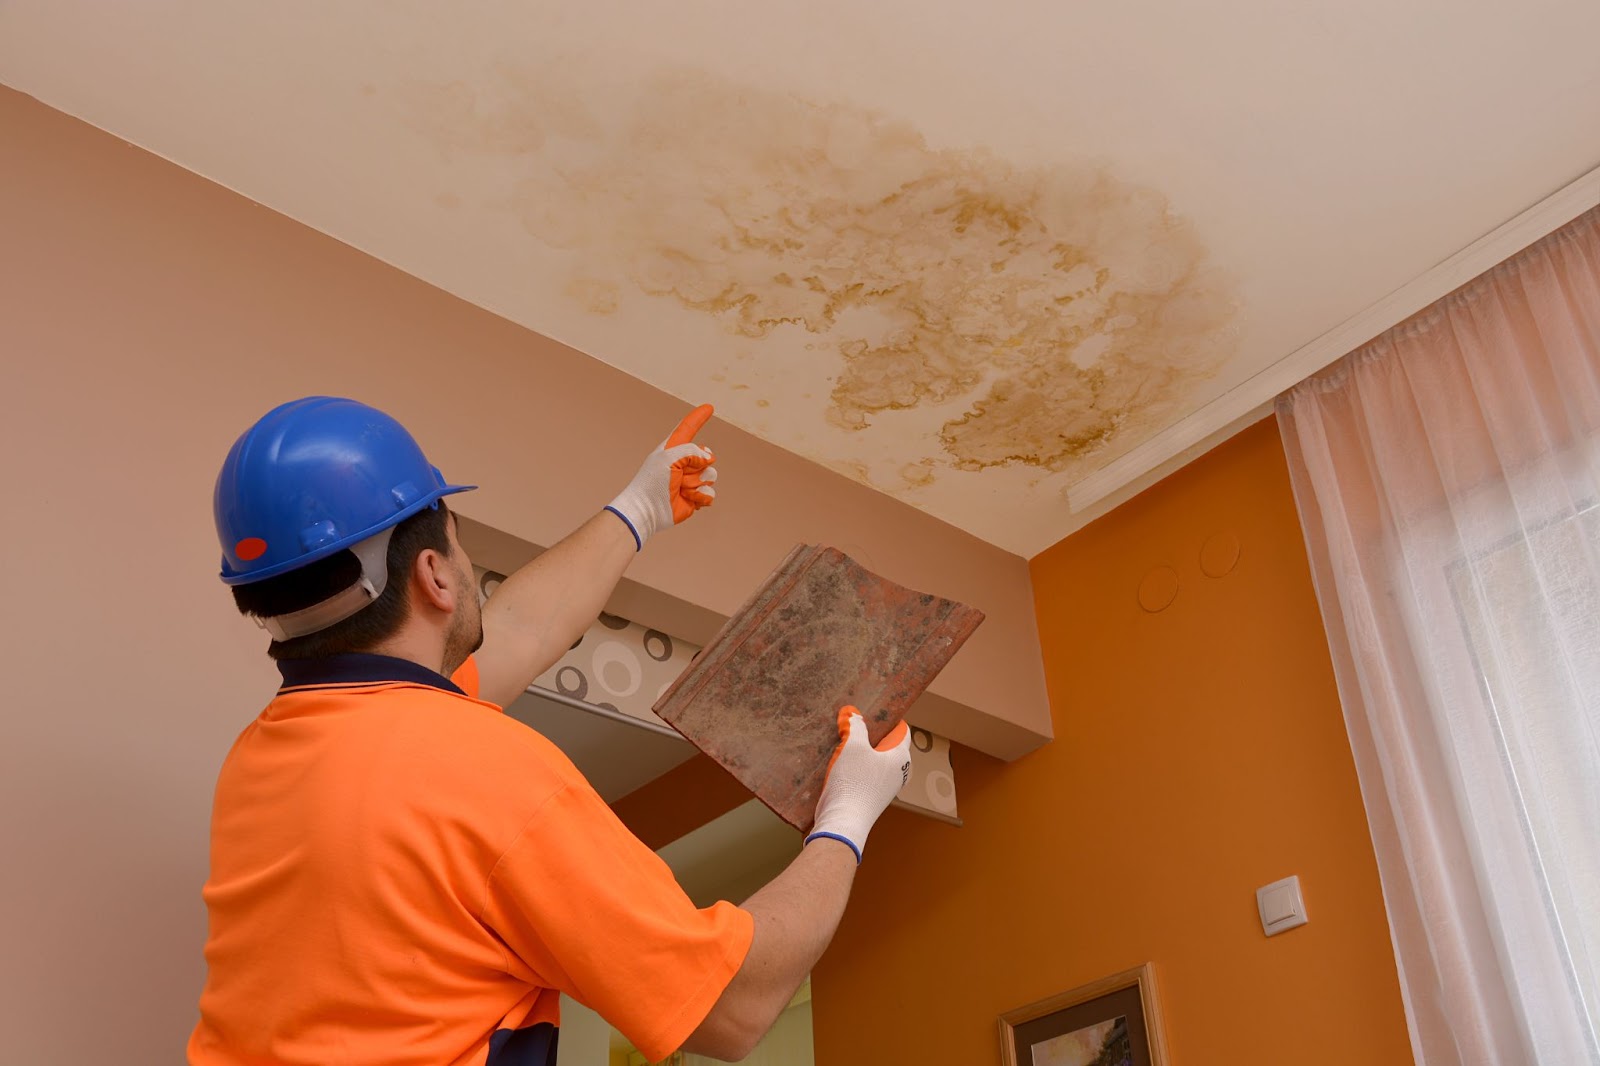
- Discoloration: Discoloration, in the context of water damage on a ceiling, refers to a change in color that occurs as a result of the water intrusion. The color of the ceiling from water damage can vary. It depends on factors like the extent of the damage, the duration of exposure, and the characteristics of the water itself.
Water-damaged ceilings commonly exhibit discoloration in yellow, brown, or gray shades. These colors are often associated with the staining caused by water-soluble substances and minerals present in the water that seep into the ceiling material or interact with it. The discoloration can range from light spots or streaks to larger, more pronounced patches.
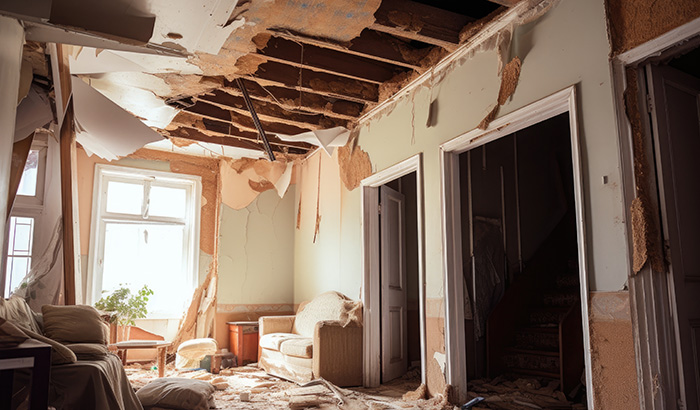
The type of ceiling material can also influence the specific color of the ceiling. For example, in gypsum or drywall ceilings, the discoloration can appear darker than the surrounding areas. - Sagging or bulging: Sagging or bulging in a ceiling can indicate water damage. When water infiltrates the ceiling, it can saturate the building materials, causing them to become weakened and lose their structural integrity. As a result, the affected area may start to sag or bulge.
- Peeling paint or wallpaper: When water infiltrates the ceiling, it can cause the paint or wallpaper to lose adhesion and peel away from the surface. Water disrupts the bond between the paint or wallpaper and the underlying material, leading to separation and detachment.
Peeling paint or wallpaper indicates moisture has penetrated the ceiling due to a water leak or excessive humidity. The water may come from various sources, such as roof leaks, plumbing issues, or high humidity levels in the room. Over time, this moisture can seep into the ceiling materials, causing them to become saturated and peeling paint or wallpaper.
Taking Immediate Action
It’s important to take immediate action when you notice ceiling water damage. The most important steps include shutting off the water source, protecting your belongings, and drying out the affected areas. Let’s take a closer look.
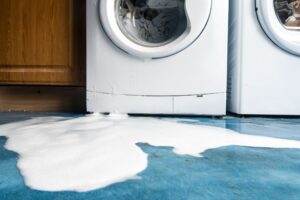
1. Shut off the water source: Shutting off the water source is essential when there’s water damage on your ceiling because it helps to prevent further water from entering the ceiling and causing more damage.
The water source could be from a broken pipe, overflowing bathtub, leaking roof, or any other source of water leakage. Turning off the water main is the best option to minimize the risk of more water damage until the source of the leak is identified and repaired.
If the water continues to flow into the ceiling, it will cause even more damage, including the growth of mold and mildew. It can even compromise the structural integrity of the ceiling. Turning off the water source immediately helps limit the damage and the risk of dangerous mold growth.
2. Protect your belongings: Protecting your belongings when there’s water damage to ceiling is crucial to minimize further damage and salvage as much as possible. Here are some steps you can take:
- Move and cover items: If belongings are underneath or near the damaged ceiling, carefully move them to a safe and dry area. Place them on elevated surfaces or use plastic covers, tarps, or plastic bins to protect them from any potential drips or water splashes.
- Prioritize valuable and sensitive items: Identify and prioritize valuable or delicate items that water could easily damage. Consider moving them to a different area away from the affected ceiling to ensure their safety.
- Remove wet items: If any items have already been affected by water, such as furniture or personal belongings, remove them from the affected area as quickly as possible. Promptly drying these items can help minimize further damage or prevent mold growth.
- Use protective barriers: Cover furniture or items that cannot be moved with plastic sheets or tarps to shield them from potential water drips or debris falling from the ceiling.
Remember, safety should always be a priority. If the ceiling shows any signs of instability or sagging, avoid being in the affected area until professionals have assessed and repaired the damage.
By following these steps, you can help protect your belongings and minimize the potential damage caused by water intrusion from the ceiling.
3. Drying out the affected area: Drying out the affected area is crucial to prevent further damage and mitigate the risk of mold growth. Here are some steps you can take to dry out the area:
- Ensure safety: Before starting the drying process, ensure the power supply to the affected area is turned off to avoid electrical hazards. Additionally, wear appropriate personal protective equipment such as gloves and a mask to protect yourself from contaminants.
- Remove standing water: If standing water is on the floor or accumulated in the affected area, use a wet/dry vacuum or a pump to remove it. Avoid overloading electrical circuits or creating more damage while removing the water.
- Increase ventilation: Open windows and doors to improve airflow and promote ventilation. Use fans to circulate the air and dehumidifiers to remove excess moisture.
- Remove wet materials: Remove damaged materials, such as wet insulation, carpeting, or ceiling tiles. These materials can hold moisture, promote mold growth, and hinder drying.
- Use dehumidifiers: Place dehumidifiers strategically in the affected area to extract moisture from the air. Follow the manufacturer’s instructions and ensure proper drainage of the collected water.
- Utilize air movers: Position air movers or fans to create airflow and enhance evaporation. Direct the airflow towards the affected area, paying attention to hidden or hard-to-reach spaces like wall cavities or the backside of the ceiling.
- Monitor moisture levels: Use moisture meters or hygrometers to monitor the moisture levels in the affected area. Regularly check and document the readings to track progress and determine when the area is sufficiently dry.
- Utilize desiccants: Consider using desiccant materials like silica gel or calcium chloride to absorb moisture from the air. Place them strategically in the affected area and follow the manufacturer’s instructions.
Drying out the affected area thoroughly prevents mold growth and other long-term consequences. It’s important to address water damage promptly and take appropriate measures for effective drying.
Call Total Flood and Fire Restoration Today
Are you facing water damage on your ceiling? Don’t worry; you don’t have to go through it alone. Total Flood and Fire Restoration is here to help you navigate the process and restore your property from water damage to the ceiling.
Our experienced team of professionals specializes in water damage restoration, using the latest techniques and equipment to quickly and effectively address the damage.
We are committed to providing efficient and reliable service, ensuring your satisfaction every step of the way. Contact Total Flood and Fire Restoration today, and let us handle your restoration needs with care and expertise.